More info will be posted here in the coming weeks including a video on the pathway props.
As previously stated these props come as a set of 5 and only include the 3D printed parts. The required pixel strips are not included as Inspire Light Shows is not a pixel vendor. While any pixel strip can be used and one can certainly make their own strips to size using a larger spool, we worked with Ray Wu to make available pixel strips that were ready made to fit inside the pathway props. The specifications on the pixel strips in the strip stakes are strips that are 60 LEDs per meter and each LED is its own pixel. The 2815 pixel strip is a good choice for this project as it can be found with these specs and has a redundant data channel. The total number of pixels on each prop is 24 and the overall length of the completed strip is 40 cm. It is important for the silicone end caps to be fairly close to the end of the strip since internal clearance is tight. In order to facilitate the data return for the 4 pin connector on the props, at the end of the strip Ray Wu installs a data return wire inside the silicone jacket that is then soldered to the data out wire on the plug. That said, you can get your strips made with standard 3 wire pigtails on either end as the stakes support having two pigtails. Below is a link to the light strips from Ray Wu. (Note that the images on his website are not quite accurate to the final product as the strips should have a 33cm long pigtail and not the really short one that is depicted)
https://www.aliexpress.us/item/3256806110958501.html
We prefer to use 3-4-3 Tee connectors with these strips since it streamlines the connection on each prop to one plug which has 4 pins (standard 3 wires, plus a data return). The beginning and end of each of these Tee connectors is a standard 3 wire connection, so these connect to the controller like any other 2811 pixel. For our own display we use the natural spacing of the Tee’s to place the props which is about every foot. The other advantage of using a 3-4-3 Tee connector is that they distribute power more evenly along their length as opposed every light being daisy chained to the one before. In our display we have tested over 20 of these strips connected together via the tees and could have connected more without issue.
The 3-4-3 Tee connectors are a standard item and a link to those can be found here, but Ray will custom make them to different lengths if desired. Link to connectors.
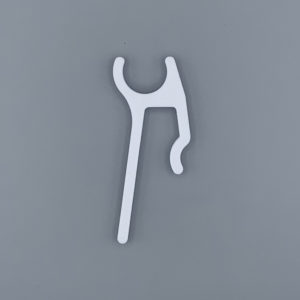
While the 3D printed bottom stake is quite strong, it shouldn’t be treated like a metal spike. Just like many woodworking projects it’s important to predrill your holes and with these stakes it’s no different. To predrill your stake holes take a 1 or 2 foot piece of rebar and drive it into the ground with a hammer where you want to position the stake. Then wiggle the rebar out of the ground so that the hole is adequately sized and insert the 3D printed stake. Don’t put too much force onto the printed parts or side load them or you could damage them. If the ground is very hard it may be helpful to saturate with water to help soften.
3D printing parts is a slow process and we have a whole print farm running 24/7 to fulfill orders and build stock of the more popular items. If you order a product that shows “made to order” we will move it directly to the print queue where it will be printed as soon as possible. While normal processing times for most orders with made to order items is less than a week, it can fluctuate. Very large orders can also experience longer than normal processing times as well because of the high number of hours it takes to produce lots of parts. If processing times are expected to be longer than two weeks before shipping, there will be a banner at the top of the website indicating the expected wait times. See the FAQ page for more info.

Reviews
There are no reviews yet.