
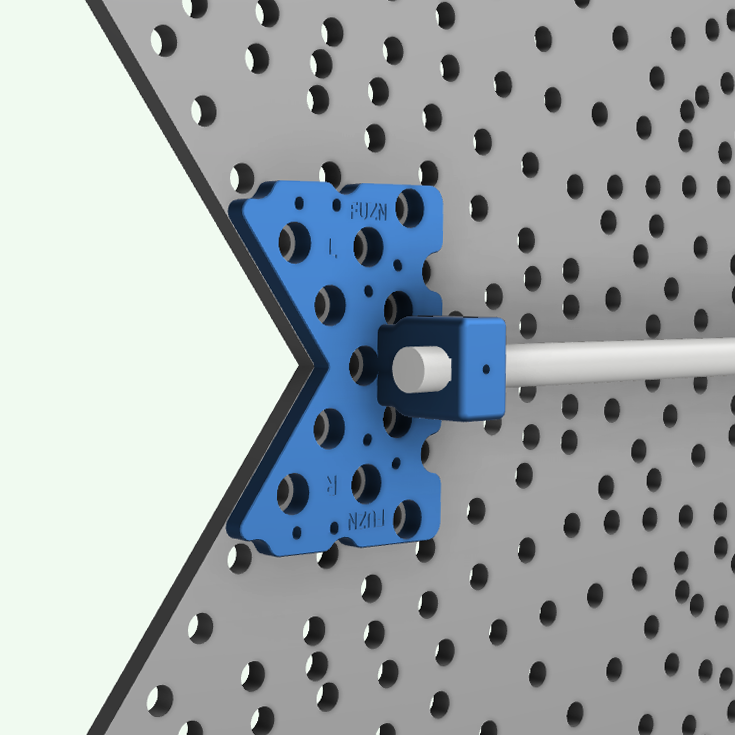
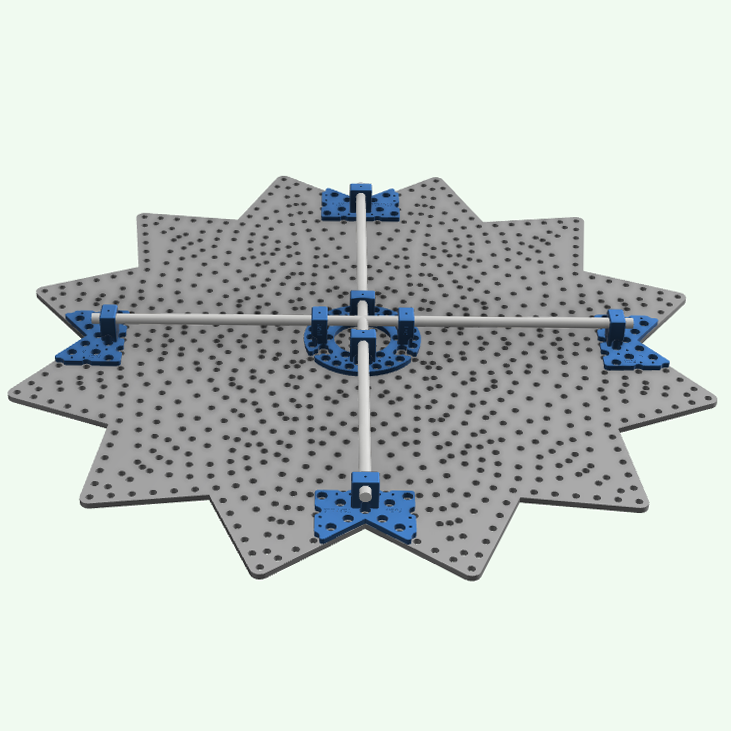
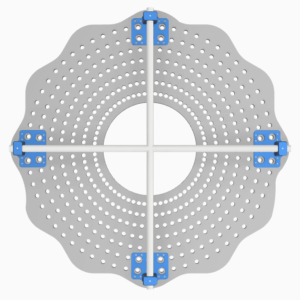
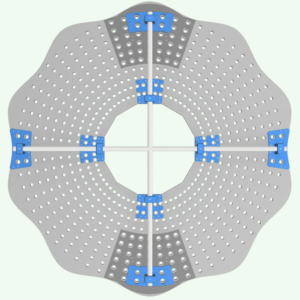
Because of the limited space to design mounts to fit along the center section of the Fuzion, the mounts are designed to be both zip tied and bolted to the coro. It is essential that the center mount be bolted through to the front of the prop to add sufficient strength and it is recommended to do so on the outer mounts, but those are less critical. At each of the 8 post mounts you will need a 3.5″ long 1/4 x 20 screw or bolt, (2x) 1/4 x 20 nuts and a 1/4″ washer in addition to zip ties. (If you choose not to run the bolts to the front of the prop on the outer mounts, you will use a shorter a 2.75″ long 1/4 x 20 screw or bolt and one 1/4 x 20 nut at each post) Start by embedding the 1/4 x 20 nut into the bottom of all the mounts. The easiest way to insert them is to temporarily insert the bolt from the top of the mount and thread the nut onto the bolt. As you tighten the bolt it will pull the nut into the mount. You can then mark on the prop where to make the holes for both the zip ties and for the 1/4″ post mount bolt to go through the coro. While the prop may look symmetrical at first glance, there is a specific top, bottom, left and right as the pixel patterns are not the same at each of the points. If your prop does not have the wiring diagram printed on the back side, you will have to pay very close attention to the correct orientation using the xLights model. After the holes are made on the coro you can zip tie the mounts to the prop. Insert the EMT into the mounts and mark where the holes need to be drilled for inserting the bolts through the mounts. If your prop was slit in half for shipping, it’s always best practice to run the continuous piece of EMT perpendicular to the slit. Next drill 1/4″ holes completely through the EMT at all the hole locations. Glue the bushings into the PVC cross using epoxy or super glue and then feed the EMT into the mounts with the completed PVC cross in the center. At each post you will insert the bolt from the top of the mount and tighten it against the embedded nut at the bottom of the mount. Just careful not to over-tighten or you could crack the mount. The excess length of the bolt should now be sticking out of the front of the prop where you will insert the washer and another 1/4″ nut and tighten that down until it fits snug.


Fuzion Mount STL
$15.00
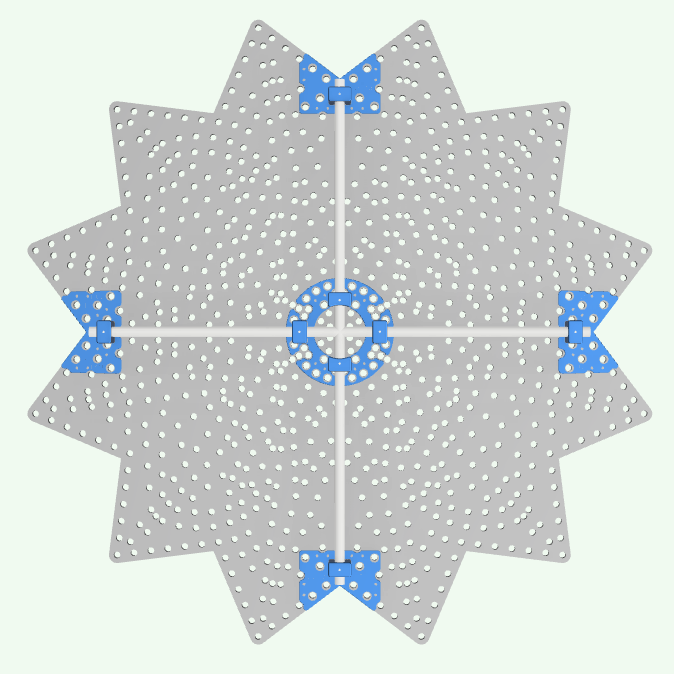
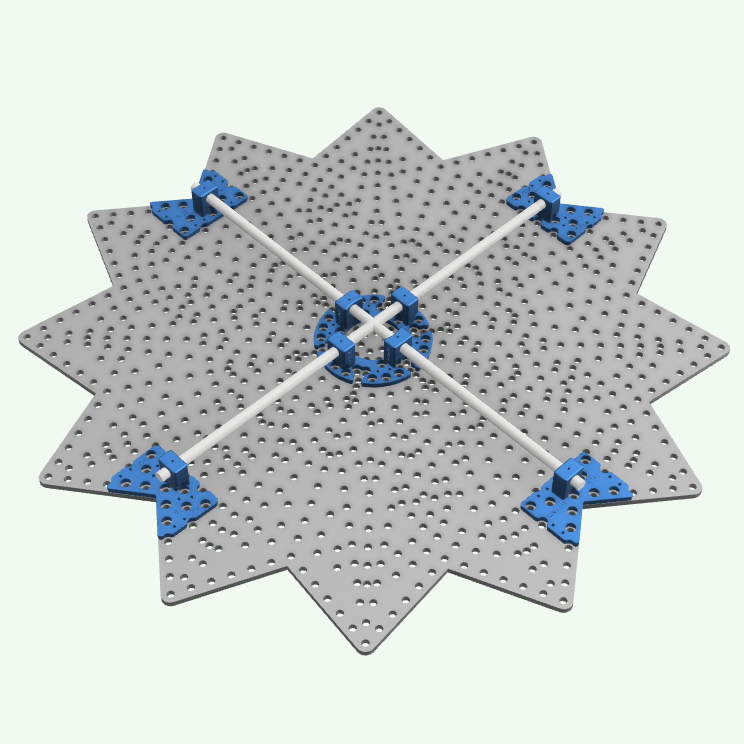
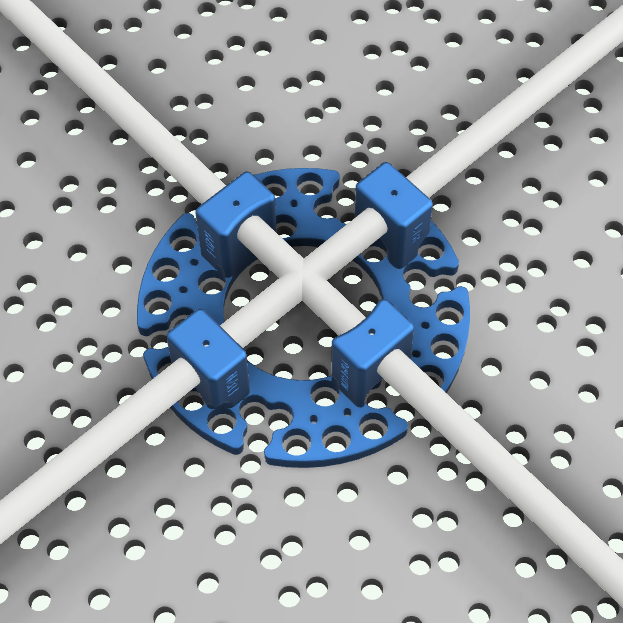
3D Printed mounting system for the Gilbert Engineering Fuzion 47″. The mounts provide a frame structure behind the coro to increase strength and allow mounting to various surfaces as well as provide rigidity to the prop after it has been slit in half for shipping. Due to the limited free space around the center of the Fuzion, these mounts are designed to be both bolted and zip tied to the prop for extra strength and are sized for either 1/2″ or 3/4″ EMT conduit. The conduit is secured on each mounting post by using a 3.5″ bolt that tightens against a nut that gets embedded to the bottom of the post. The bolt then continues through the front of the prop where it is secured again using a washer and another nut. This creates an incredibly strong post that will hold up to the weight of this prop. (See renderings for an example of how it all fits together) The center junction is made using either a 1/2″ or 3/4″ PVC cross (depending on the size of conduit used) which allows the smaller EMT conduit to pass through utilizing EMT to PVC bushings which are included in the files. More information listed below.
Note: This is a digital purchase for STL files and not a physical product.
Related products
-
 STL Files
BOAW Mount STL
$10.00 Select options This product has multiple variants. The options may be chosen on the product page -
-
-
 STL Files
MOAW Mount STL
$15.00 Select options This product has multiple variants. The options may be chosen on the product page
Reviews
There are no reviews yet.