
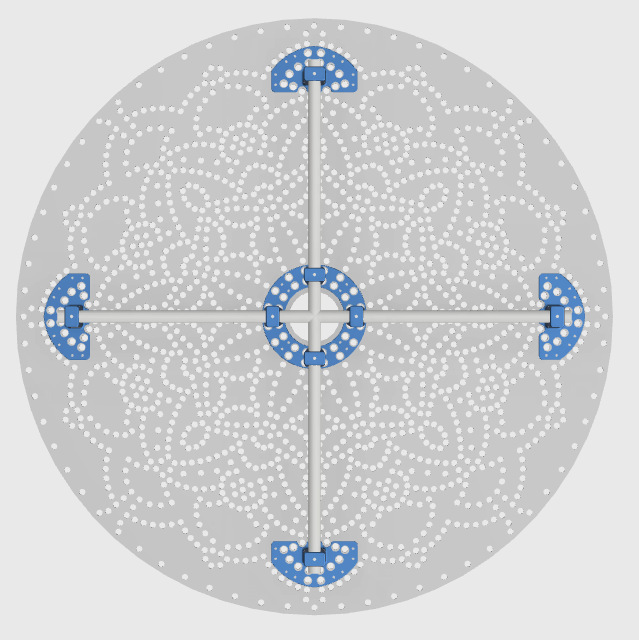
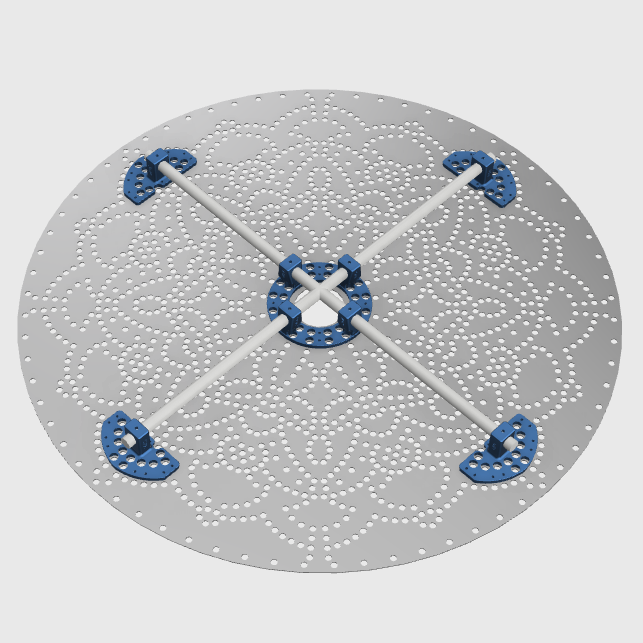


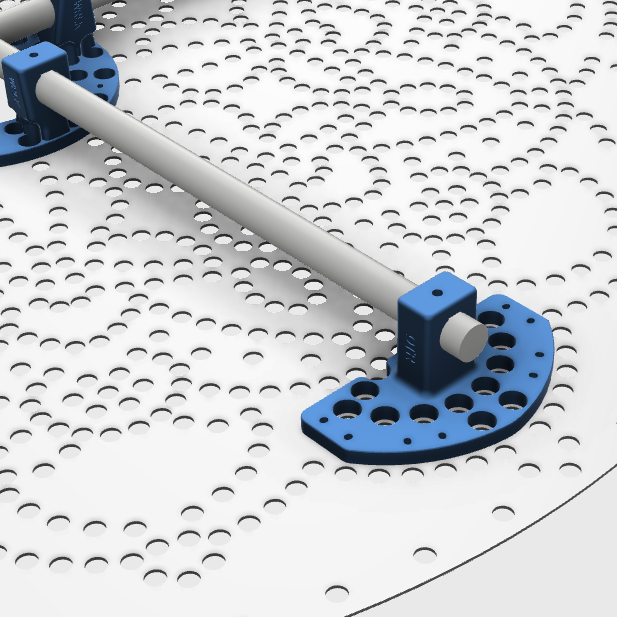
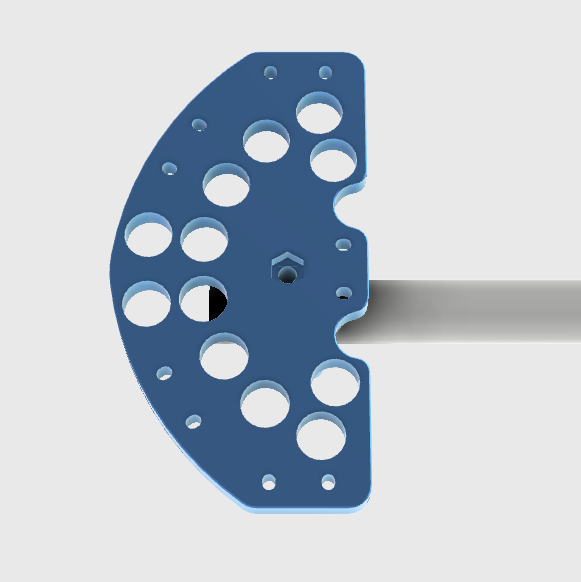
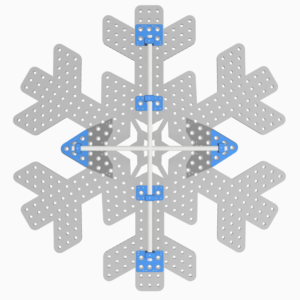
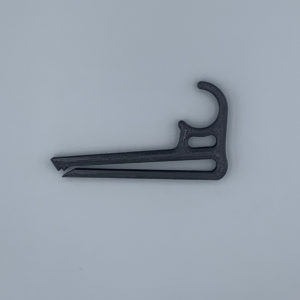
Because of the high weight and pixel density of the Warlock prop, the mounts are designed to be both zip-tied and bolted directly to the coro for maximum strength. Each of the 8 post mounts requires:
- (1x) 75mm long M6 bolt
- (2x) M6 hex nuts
- (1x) M6 washer
- Zip ties
Step-by-step instructions:
-
Install embedded nuts: Begin by inserting an M6 nut into the bottom of each post mount. You can do this in one of two ways:
– Gently tap the nut into place with a mallet or other non-marring tool.
– Or temporarily thread the nut onto a bolt inserted from the top of the mount and tighten it to pull the nut down into its pocket. -
Mark mounting holes: Use each mount to mark the coro for both the bolt hole and zip tie slots. While the prop may appear symmetrical, the hole locations vary slightly at the outer mounts. These mounts are based on the average spacing, so they won’t align perfectly—just center the mount visually among the surrounding holes. There is sufficient clearance.
-
Attach mounts to coro: Drill the marked holes and zip tie the mounts to the prop.
-
Prepare conduit: Insert 20mm conduit into the mounts and mark the bolt pass-through locations. If your prop was split in half for shipping, it’s best practice to run the continuous conduit section perpendicular to the split.
-
Drill conduit: Drill 6mm holes completely through the conduit at each marked location.
-
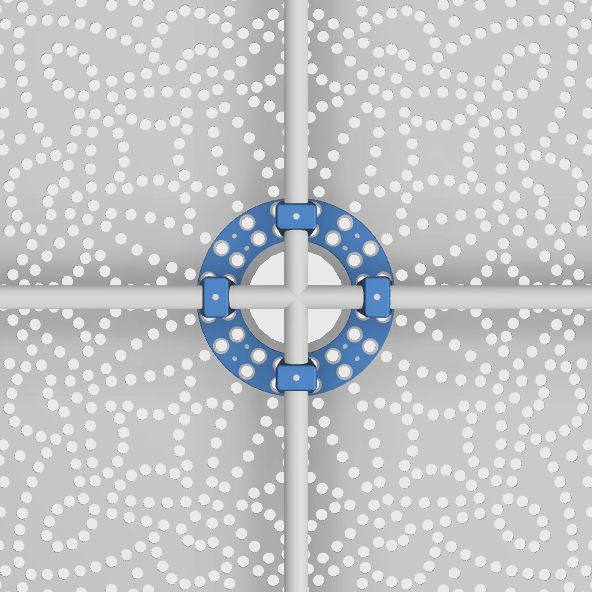
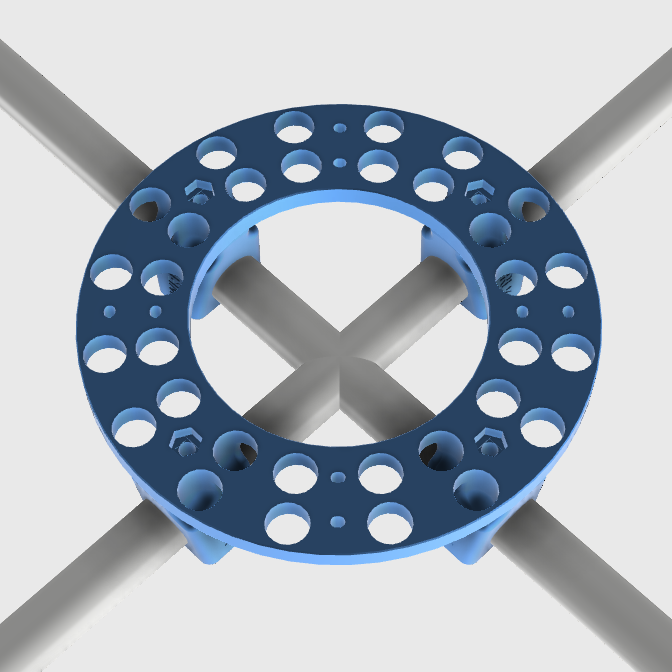
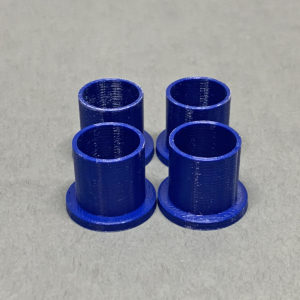
Assemble center junction: Glue the included bushings into a 25mm PVC cross using epoxy or super glue. Insert the conduit into the mounts with the completed PVC cross in place.
-
Secure the frame: Insert a 75mm M6 bolt from the top of each mount, tighten it into the embedded nut, and continue the bolt through the coro. Tighten just until snug—do not over-tighten, as this may crack the printed part.
-
Lock from the front: From the front of the prop, place a washer and a second M6 nut onto the exposed bolt and tighten until secure.
As with all our designs, we strive to utilize the precut zip tie hole locations for our mounts. However, these pre-made holes don’t always align perfectly for optimal mount placement, which means you may need to create additional holes in the coro to secure the mounts with zip ties.
Reviews
There are no reviews yet.